


I’m going to continue catching you up on how much of a slacker I am… Next in the series of Slacktastic Fun is the subway art I made for my mom. It’s terrible to admit that this was almost a year in the making (I talked about it in my New Year’s Resolutions…). A YEAR! Ridiculous. I had thought I’ll make it for Mother’s Day, and then that came and went. Then I thought I’ll make it for her birthday… and I kind of did. I was just a month, or two late. #WorstDaughterEver
Anyways… back to brass tacks. My mom loved the one I made for Hubby for our anniversary. Who are we kidding? It was basically for me, but I disguised it as a gift for him.
[insert evil laugh here]
So I figured I’d take a cue from the one I’ve already made, but make it different. Makes total sense, right?
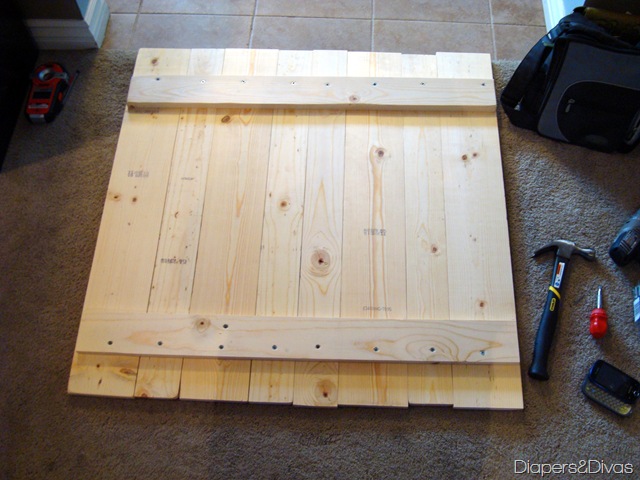
I followed the same basic principles as I did when I created my version. I used the same wood and varied plank widths, I just had the nice gents at Home Depot cut them down to a different size. After measuring the spot where the subway art would live, I figured it should be 30”w x 42”h.
I followed the same steps I did before. I sanded each plank and added some irregularity to them by rounding some corners and creating a few waves.


I assembled the planks using 1x2s on the back and lots of screws.
The wood is soft, so to make sure each plank was secure, I busted out the hand-screwdriver, too.
Next it was time to stain.

Then it was time to bust out my Cricut and cut some vinyl letters. I used white Contact Paper (aka shelf liner) that I cut into 12” x 12” sheets and fed through my Cricut. And then it was time to play the arranging game:

I had a list of 10-12 things that I wanted to make sure were included on the overall board. I began by cutting out some of them and laying them out to check size and shape. Then other little things started to evolve, like using the “a” at the end of Arizona as the “a” in Utah, too, like a crossword puzzle.
And then it evolved some more:
Some of the things stayed where they were, while others got resized and revamped. It’s definitely a puzzle that you have to work with until it eventually just fits. Very much like the picture frame collages I’ve done, too. (If you’re interested in those, you can check them out here, here, and here.)
Originally, I thought I would put the lettering on the wood and paint the whole piece one color, and then peel off the letters to reveal the dark rich wood tone underneath a la Lani’s Canvas Subway Art. But first, I wanted to see it on the mantel because I wasn’t 100% sure what overall color I should paint it.


Pretty awesome, right?! I love that it’s pretty clean and simple with a little rustic thrown in. My mom is over the moon for it. I’m just sad that it took me so dang long to get my butt in gear and do it.
What have you finally crossed off your To-Do list? Have you lagged on doing something for your mom? Have you created your own version of the subway-art craze?
I love these. I have to do one!
ReplyDelete