Showing posts with label DIY. Show all posts

Tuesday, September 10, 2013

Tutu Cute!

I definitely think that I have a fabric problem. Like a big one...kind of bordering on hoarder tendencies. I have so many different ones that I just hang onto for no apparent reason. I keep thinking "Oh maybe I'll use this for my shop! Or for a quilt! Or for looking pretty on a shelf! I'll just keep it here for a project that i'll never get too because I may want to use it later for a completely different project." Yes...my mind is a mess...

So when my friend Jacqui sent me an invite for her daughter's second birthday....I decided to put my fabric...and Pinterest...to use (finally!)  Life has been so hectic and busy that I haven't had time to breath let alone crafting and blogging....so it felt good to get my hands in it again!

I took inspiration from this Pinterest pic

Amy Giggles Designs: Fabric Strip Tutu Tutorial


I knew I wanted to do a tutu for sweet lil' Emma and when I saw that fabric tutu I secretly yelled "Success!!!"  Ok maybe I screamed it far to loud and scared the dog and interrupted a ninja turtles movie (for which I got very dirty toddler stares)...but it was perfect!  It's seriously just so easy and simple and perfect to use up all those fabrics I've been hoarding.  I also made a simple applique of Minnie on a tee to match.  It's more for dress up and fun...but I think it's just so sweet!


So glad I decided to make it smaller halfway through.  That girl is petite!!

I party with Remodelaholic

Thursday, July 25, 2013

In other news...

Where does the time go?! Seriously... I'm starting to get a little anxious about the small amount of time that we have left until our little family of 3 becomes a family of FOUR. I suppose to start with, I owe you this little update:

That's right folks! Apparently we breed boys over here at Diapers & Divas. A funny thing happens when your second kid is on the way... You don't do much to prepare. I've done some random things around the house like go through our stock of baby clothes to see what we might need:

My the looks of it, we aren't hurting for clothes for our newest little guy. This is all just for newborn to 9 months. But I organized it all nicely into space bags, the ones where you suck the air out with a vacuum, so that I can just grab the bag with the clothes we'll need for that stage. When he's starting to grow out of that stash, it's time to grab the next back, throw it in the washer, and bam! we are good to go!

I also came across a few new things, or new-to-us things, after having loaned out Will's baby clothes to a friend or two. I got our clothes back, and then some! What a nice surprise! A couple of my favorites:

A little velour Paul Frank sweat suit?! Are you kidding me?! And check out the little monkey ears on the hood. I die. It's just so cute.
And a little old man cardigan! There really is nothing cuter than a little dude rockin' an old man sweater and some dark jeans, and maybe a pair of chucks.

Will was eager to help me that afternoon, so I put him to work:
The kid loves to use the vacuum wand. So instead of him running away with the attachments and using them like they're swords, how about we do something a little more productive... ;) He's a pro. He's definitely going to make a great big brother.

There are a few other things on our To Do list to prep for this little dude's arrival, like:

And another great inspiration pic by another blogger:


  • Our Master Bedroom will be getting a little makeover, too. Wittle Bird will be bunking in our room for a while so as to hopefully not totally turn Will's life completely upside down all at once. The first step in taking care of that is that all of this has to go:

Scary, right? The desk is going into storage, the shelves on the wall are coming down (maybe re-purposed in the closet re-do you saw above), and the bags in the corner need to go to Goodwill. Our dresser and TV will be going into this lovely little niche. Wittle Bird's crib and changing table/dresser will be going on the wall where the dresser currently is. Do you follow? Don't worry, I'll be sure to do a post about the whole crazy process. I'm also thinking about a stenciled wall where the crib is going. Just to kind of define it as it's own little space. Here are a few fun things I'm thinking:

[or maybe a fun ombre wall]

[and I love how bright and cheery this space is]

Decisions decisions...

So that is where we are at: Thinking about, thinking about prepping for some rearranging and some reorganizing. Do you have any tips or tricks for housing two boys' in a 2 bedroom condo? I'm all about finding ways to make the most out of our small space. Did you totally lag on preparing for the arrival of your second kiddo? Please tell me I'm not the only one... ;)


Monday, February 18, 2013

DIY Chore Chart

Santa started quite the Skylanders craze in our house. Will couldn’t be happier, and is now addicted to these things! Seriously, he talks in his sleep about Skylanders.
Since Hubby & I are just a smidge smarter than a 3 year old, we decided that maybe we should use his Skylanders addiction to our advantage. Thus the Kiddo Chore Chart was born!
Chore Chart-001
I cruised Pinterest for some inspiration, but I couldn’t find anything that quite fit the bill. Hubby & I agreed that it needed to be colorful, fun, and needed to have some kind of moving component.

Here’s what I used:
  • Magnetic White Board (I had this over my desk & wasn’t using it.) – $8.94
  • Metal Spiderman Bucket (from the $1 bin) – $1
  • 3M Command Hook & Velcro Strip (I always have these around the house) – $3.94 for 2 pack
  • Square Glass Magnets from Staples – $1 for each 6 pack, need 2 packs
  • Pack of Dry Erase Markers – $7
  • Mod Podge
I had everything except the magnets & dry erase markers on hand, so I spent $10 out of pocket. If you needed to buy everything, you’re barely over $20. Not too shabby!

First I used the velcro strip thingys and the hook to hang the board & bucket on the wall. I made sure to do it at 3-year-old height, since Will would be the one moving the magnets.
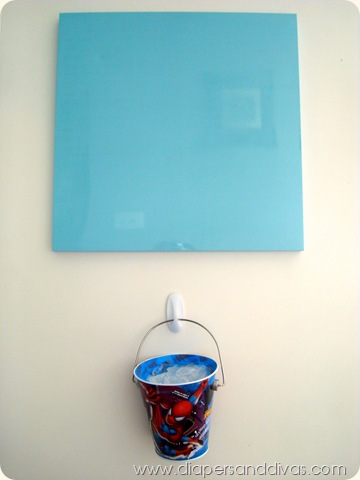
DSC01496
I am on a gold spray kick, so I taped off the inside of the Spiderman bucket and took it outside for a makeover…
DSC01499
DSC01501After a few light coats of primer and gold spray paint, we were in business. I also sprayed the base of my hurricane while I was at it. I was tired of it being black… the gold is FAB!

photo 1 (4)
Next, it was time to work on the magnets.
DSC01503
We brainstormed for quite a while for some “chores” Will could do. The key is to keep it simple. He’s only 3. So part of the strategy of this Chore Chart is for Will to willingly do everyday tasks without incident.
  • Brush Your Teeth
  • Get Dressed
  • Help Clean Up The House – This is just what ever I ask him to help me with. Put the utensils away from the dishwasher, help sort the laundry & load it in the washer, etc.
  • Clean Up Your Room
  • Learning – more on this in a minute.
I just used some cute clipart I found on Word and online. I sized them up so they were a tad smaller than the magnets and printed them out on our regular ol’ inkjet printer, on regular ol’ printer paper.
DSC01504
Now that they’re all cut, I placed them on the magnet squares and used a little paint brush to brush on some Mod Podge.
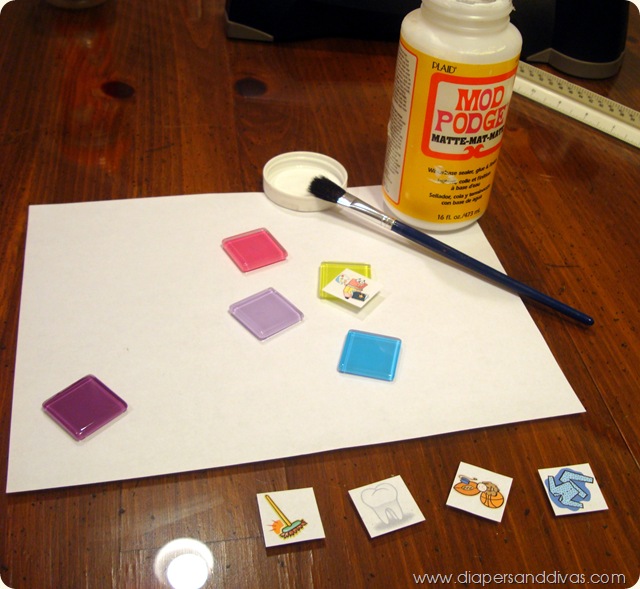
DSC01508
I made sure to Mod Podge the edges well because if a little edge is lifted, someone’s little fingers will find it and peel it. It dries clear, so there’s no need to worry about it looking a little messy.
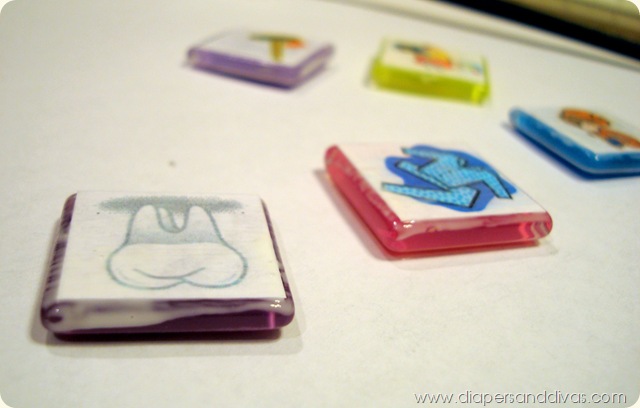
DSC01513
While the Mod Podge dried, it was time to jazz up the dry erase board:
DSC01515
Now we are in business:
DSC01519
Once it was all installed & ready to go, Hubby sat down and explained how this system works. Will was just a little excited. Winking smile
DSC01516  DSC01518
Here’s how it works:
DSC01522
Every day Will brushes his teeth (or Mom or Dad brush his teeth), and it is a nice & easy experience, Will gets to move his magnet up one square. The same goes for Will getting dressed by himself and cleaning up the toys in his room. Of course, there’s still drama while doing these chores, but typically, he gets one warning like “if you don’t do this nicely, you don’t get to move your magnet”. Sometimes that is a nice reminder and he changes his attitude, and sometimes he doesn’t. It’s a bummer when he doesn’t get to move the magnet up, but that’s life. We don’t make a big deal about it or yell about it. We just remind him that that’s not how you behave, you don’t get to move it, so you’ll have to try and do better next time.

The “Helping Around the House” and “Learning” magnets work a little differently. Those aren’t necessarily on an everyday basis, but maybe every other day or so.
He has happily helped put away the utensils from the dishwasher:
photo 3 (2)I’ve also had him help me separate the laundry, put the clothes in the basket, and load it into the washer. He also helps put his clean clothes away in his drawers. My favorite part of this particular task is that he’s asked “Mom, are there any chores I can help you with?”. Be still my heart.

The “Learning” magnet is exactly that. He’ll be 4 in a few short weeks, so we figured we needed to work on some pre-kindergarten basics. We’ve worked on writing and recognizing letters:
photo 5 (2)Since Will isn’t much of a color-er, we vary the learning to other things like puzzles, counting & organizing coins or berries, and other hand-eye coordination skills. It’s also a tv-off, quality time activity, too. Bonus points all around.

DSC01521Once he’s moved the chore magnet to the top, he can take a Skylander magnet out of the bucket and put it in the spikey bubble. 5 Skylanders in the spikey bubbles = a new Skylander!
DSC01525The Skylander magnets are just Skylander stickers that came with some of the Skylanders he got for Christmas. Major bonus that they were just the right size for these magnets.

I make sure to put the Chore Chart in a prime location:
DSC01527
After a about a week and a half of hard work, Will earned his first reward:
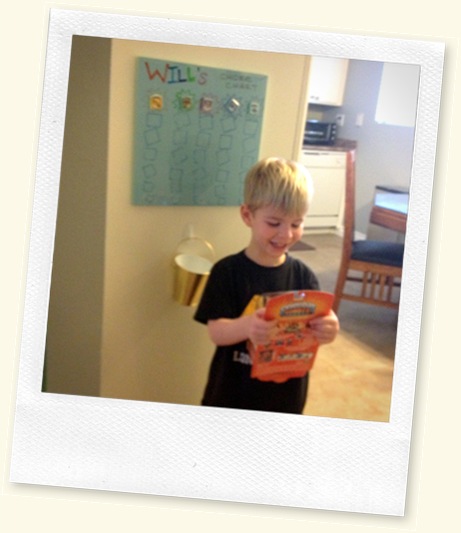
photo 2I think he’s excited… Smile

Do you have a Chore Chart for your munchkin? Do you have any ideas for other types of chores a 3 or 4 year old can do? I’d love to hear, and maybe even use them to evolve our Chore Chart. It’s always good to mix things up!


signature

Thursday, January 3, 2013

Tickle My Pickle

You got my pickle? I got your pickle! Get your minds out of the gutter… It’s time to talk pickles…
DSC00941DSC00939


DSC00944


Since I have a few canning adventures under my belt now (apple butter, grape jam, refried beans), I figured it was time to give pickles a whirl. I love a good pickle, almost as much as I love bacon, so it’s about time I learned to make my own. As usual, my favorite canning book, Canning For A New Generation by Liana Krisoff was a great jumping off point. I can’t follow directions blindly, so I added some extra spice to the recipe on one of the pints to see how much better it would be.

As usual, Liana gives great tips, like pasteurizing (heating the jars in water at 180 degrees for 30 minutes) rather than processing in boiling water for a shorter period means you’ll end up with crispier pickles.

Honeyed Bread and Butter Pickles with a Kick
makes 3 pint jars
DSC01001
Ingredients

1.5 lbs pickling cucumbers (3 to 4” long), cut into 1/4” rounds
1 small onion, thinly sliced into half circles
1/8 cup plus 1.5 tsp pure kosher salt
1 tbsp yellow mustard seeds
1.5 tsp celery seeds
1 tbsp crushed red pepper flakes
3 cups cider vinegar (5% acidity)
3/8 cup honey
3/4 tsp turmeric
3/4 tsp dry mustard powder

Directions
DSC00947Put the cucumbers & onions in a large bowl & toss with 1/8 cup salt. Cover with a layer of
ice cubes and refrigerate for 8 hours or overnight.

DSC00996


Pick out unmelted ice, drain well, and rinse under cold running water. Toss with mustard seeds, celery seeds, and red pepper flakes.
Set aside.

DSC00998


In a nonreactive pot, combine vinegar, 3/4 cup water, honey, turmeric, mustard powder, and remaining 1.5 tsp salt. If pasteurizing, bring the mixture to 160-180 degrees on a candy thermometer.


DSC01001


Carefully pack the cucumbers and onions into prepared jars (not too tightly). Ladle the hot vinegar mixture into the jars, leaving 1/2” headspace at the top. Use a chopstick to remove air bubbles around the inside of each jar. Use a damp paper towel to wipe the rims
of the jars, then put a flat lid and ring on
each jar until its finger tight.
 
DSC01004

Pasteurize the jars in the canning pot – water in the pot at 180 degrees for 30 minutes.
Remove the jars to a folded towel and do not disturb for 12 hours. After 1 hour, check that the lids have sealed by pressing down on the center of each flat lid. If you can push down the center, the jar didn’t seal and it should be refrigerated immediately. Ta-Da! You’re done!


These didn’t last very long in our house… Next time I’ll probably double the recipe so I have some to share. And maybe add another pinch or two of red pepper flakes for some extra heat.

signature

Related Posts Plugin for WordPress, Blogger...
 

Blog Design by Eedee Design Studios