Showing posts with label link party. Show all posts

Tuesday, December 4, 2012

Hot chocolate bar

Being that we don’t have a mantle in our house I always like to dress up our little areas with something a little different and fun. Last year I did a drink station in our dining room (you can read more on that here)

DSC_0814


This year I decided to do the same-ish concept but make it a little more kid friendly. We are still having our annual Santa Party and this little Hot Chocolate Bar will be awesome for kids and grownups alike!

DSC_0364

Notice I still have yet to paint that little dresser of goodness.  Next year.  I swear it.

I want the theme of my house to be a bit modern and a bit rustic.  I paired my burlap trees that I made last year (here) with some shiny red ornaments and one of my felt poinsettias…also crafted last year (here). The bar got filled with all kinds of good fixin’s for hot chocolate like candy canes, peppermint marshmallows, and cookies for dippin’ and stirrin’.


DSC_0354

DSC_0355

I just used whatever I had on hand, and ball jars truly do work for freaking everything don’t they? 


DSC_0356DSC_0357DSC_0358

And you really can’t have a hot chocolate bar without hot chocolate right?  This is homemade and AWESOME…easy peasy recipe to come soon!

DSC_0360DSC_0361

There we have my little bar!  If you’re cold and need a lift, come on over and I’ll have a cup of cocoa all ready for you!  If you’re good…you might get a little Schnapps in there too Winking smile!

DSC_0364

Tuesday, July 10, 2012

Dye Job


Yep, I decided to do it again… DYE!

Even though Will shoots me a million times a day (while we’re playing… He’s usually Iron Man, while I’m any range of bad guys…dinosaur, monster, rabbit, Magneto, you know, the normal range of bad guys.), this dyeing was not done with a gun. It was done with my gloveless hands and a pot. Exciting stuff, I know. Well, it all started when I saw some of our favorite bloggers, YHL & BowerPower, announced the Pinterest Challenge last week. We are seasoned pros when it comes to this challenge stuff. You can check out our previous challenge awesomeness here, here, here, and here. We’ve done some pretty awesome stuff!

I grabbed a little inspiration from some of our other favorite blogger gals:

                     Centsational Girl                                                  Made

Enter the Pinterest Challenge:
DSC00194I’ve had these shorts for a while now. I picked them up last summer on clearance at Old Navy. They fit great, but the color is pretty …eh. Pastel yellow is not really my thing. Especially with my whiter than white gams. Dye them! Why the heck not!

I’m digging the bright shorts trend right now, and I just got a pair of bright blue ones, so naturally, I picked up some red dye.
DSC00201I also picked up blue, but decided that red was the better way to go. Since the shorts were light yellow, I thought that they might end up going a little orangey, would was actually part of my plan. I hoped for some orangey tone because orange is so hot right now!

DSC00206
Since I’ve done the dyeing thing a time or two now… I got some pots ready with a cup of vinegar and a cup of salt. I also turned the burners on super low. You don’t want the water to boil, but you want it hot. You can check out my disastrous turned fabulous dye job here with Will’s Halloween costume last year. I swore I’d never dye again, and yet here I am. I am a glutton for punishment.

Dye Job-001
I used the whole bottle of red in that pot. I rinsed my shorts in warm water before submerging them in the dye for 20 minutes. Rinse them in cool water and then toss in the washer. I added an extra rinse cycle to the washer, and for extra measure, I added one of these:

DSC00256
I love these things. Perfect for a new red shirt, thrown in with the rest of your wash and it is saved by these little sheets. Glorious.

These babies came out pretty bright and cheery!
DSC00259
I’ll definitely get more summer miles out of these shorts now that they’re a fun color. They put a little pep in my step. And if I get sunburned, they will become flesh tones shorts… Thinkin’ ahead, people! I am always putting sunscreen on my kid and forgetting about myself… #MomProblems

And because I was having so much fun with my colorful cauldrons, I dyed some white onesies I had laying around:
DSC00284
The toned ones at the top and middle were because I was messing with keeping it in for different periods of time. Maybe I created some kind of crazy contraption so my arm wouldn’t go to sleep while holding a onesie halfway in a dye bath for 5 minutes straight, and it probably looked like this:
DSC00251
And it probably didn’t work out that well… but it was fun. I was hoping for an ombre effect. Not so much. If anyone has any ideas how to do that, let me know. I tried to lower the onesie in a little more after a minute, but it just made the bottom half one color and the top stayed light after a quick all in dip, and then out for a rinse.

I definitely dyed an old grungy kitchen towel laying around:
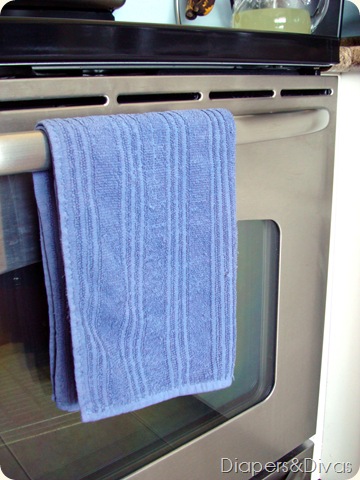
DSC00298Then it was time to call it quits because I was wandering around the house wondering what else I could dye. Before I needed a Dye-tervention, it was time to dump the dye and enjoy my new colorful shorts and towel. I can’t really enjoy the onesies since Will isn’t a fan of girly colors, but I might use them to make a friend a gift or five. Smile

My $7 shorts just got a $3 upgrade and now I have been painting the town red with them! Man, I am full of bad jokes today…

So, what have you dyed? Any tips for an ombre effect?

signature

Wednesday, March 14, 2012

DIY Yarn Letter

With many hours lost into the abyss that it Pinterest, we were jumping for joy when our fave fellow DIY bloggers said it was time for another edition of the Pinterest Challenge. Time to make a few of those pins a pin-ality. We’re livin’ the dream, folks!

Many thanks to YHL, BowerPower, Hi Surgarplum, and The Great Indoors for hosting. Maybe someday in our awesomest dreams we’ll be cohosting with the fab YHL & Bower, too! This is me wishing upon a star…

Ok. So it was time to get to work. After trying to figure out what the heck to do, I decided we needed a B in our house. And since I am the Queen B, I thought a letter B was appropriate. It’s also the beginning of our last name…
I’ve pinned a few inspirational things:


Are you pin-spired?

So I popped into Joann’s with my coupons in hand, and after debating over which size and font letter I wanted, I went with this:
DSC02829

Not too big, although I did have the GIANT B in my hand at one point, and not too little. It’s just right. I also picked up this fab Martha yarn because I really liked the wavy aspect of it. It was playing on my chevron obsession and I thought would give this B some good texture.

Yarn Letter

It was time to get to work. Sorry for the not-so-fab progress pics… gotta craft when the kid goes to bed, so it’s not the best for picture taking. I didn’t cut too long of a strand of yarn because it was just easier to work with. I hot glued the end to the back in the middle of the B’s stem. I figured I would start in the straight portion so I could get a rhythm down & then I would progress to the curvy, more complicated parts. And when I was done, I hot glued a little loop on the back to make it easy to hang.

DSC02838

It took all of maybe an hour and a half to do. I wasn’t moving very fast, and I was watching Justified… so there were a couple drool-wiping moments because Timothy Olyphant in boots & a cowboy hat can distract a girl from her crafts.

Yarn Letter-001

There’s still a lot of yarn leftover, so maybe another fun orange yarn project is on the horizon. It’s so soft! See the pic on the bottom right? See how I covered the bottom portion? I liked how the straight part was wrapping, and I couldn’t cover that part by wrapping, so I went back and just weaved back and forth. I ended up using a little bit of hot glue while laying each row just to keep it in place. No big globs, just a gentle squeeze with the gun’s nozzle directly on the wood letter to give the yarn a little something to stick to so it wasn’t rolling all over the place. And of course there were a few “OW!” moments, because what’s a project involving a hot glue gun without burning yourself a few times, or 10. I’m pretty sure those guns were invented by the devil…

DSC02853

I grabbed a nail, a hammer, and a cute little frame I picked up from Goodwill a few months back for $2.99 or so.

DSC02856

There she is! The queen B hanging in all her glory above the kitchen sink.

DSC02857

I love the little touch of glam the frame gives her. My little dude even saw it hanging this morning and said “Oh! Mom! I like that B! Good job!”. Thanks Will!

My pin-ality is complete! Check!
I think I’m ready to challenge a yarn wreath. Maybe for the springy spring!

signature

Tuesday, March 13, 2012

Pinterest Challenge: Little Clutch

I had a very hard time deciding exactly what I wanted to do for this season’s pinterest challenge, hosted by Young House Love, Bower Power, Hi Sugarplum, and The Great Indoors


I really wanted to make it a “legit” project where it was something I already pinned, something that I’ve been wanting to do for awhile, and try to make it somewhat cost free to nothing.  So as I was searching my archives I found this!

clutch

Nothing fancy…and I just labeled it with “clutch.”  Sure…I can sew a clutch right?  So I wandered over to my sewing supplies, grabbed some scraps and a zipper I happened to have (I don’t know why I had it…I’m sure I wanted to do something with it) and I got down to work.  I apologize for my lack of in process pictures…as I really didn’t know what I was doing!!  Haha!  It was a lot of trial and error and I am an expert seam ripper now.  But…the finished product is this!

DSC_0271

EEK!  I love it!  and I can’t believe I did it!  I know it does not look like the Pinterest picture…but that was just my PIN-spiration…if you will.  I wasn’t even sure if I’d be able to make a bag period, let alone one with a flap and cool tassle thing…so this is what it is.  But check this….I even made it lined!!  I feel so fancy!

DSC_0268


DSC_0274

It’s perfect for all my cosmetic needs, so easy to throw in my purse, and washable!  I started putting my phone and gloss and keys in here so it’s easy to transfer from purse to purse and easy to find in those giant Mama totes I carry around.  I love it so much….I made another one!!!

DSC_0312

HAHA!  The best part is these are small enough to make with leftover material from other projects!  Yay!  And I’ve decided that I’m going to sell these on my Etsy shop since I’m so proud to have done this ALL by myself!  My sister already requested one!  Yay!  I can’t wait to make more!  Thank you, Pinterest challenge and ladies who created it, for making me get off my butt and attempting something that I love to make now!

Monday, September 26, 2011

HalloweenTime Mantle

 Apparently Hubby & I's love for the fall & upcoming holidays is rubbing off on our spawn, aka Will. Will & I made a trip to our storage unit my parents' house over the weekend to pick up our Halloween decorations.  I told Will we'd decorate in the next day or two. While I was gone for a few hours this morning, he proceeded to tell Hubby that it was "Halloweeeeen Time, Daddy!". When Hubby told Will that we would decorate while he was napping so he could wake up to a Halloween surprise, Will said "NO! I help too, Daddy! I help fix Halloween time!". Oh. Ok then. You're the boss, kid.

So after Will's bath, that he dropped a deuce in, we got to work. Will helped place some key pumpkins and told us when stuff was too scary. I guess Hubby's love of scary things hasn't quite rubbed off on Will.... yet.

 This is what I pretend to use as my mantle. Yes, it's a bookcase, but it's my mantle for decorations starting in October...
What? You don't enjoy the random bloody limb here and there?
 
 A little closer look at the madness...

 This Oogie Boogie head is one of my absolute favorite Halloween items I own. I snagged it off of disneystore.com a few years back when  it was on clearance. Something Disney (for me) and something scary (for Hubby). That's what we call a Win-Win, folks. Oh, and they're sitting on my other favorite thing...the spiderweb runner I got a Target a couple years ago. Oh Webby, so glad to have you back!

 
 I just realized that my glitter haunted house is a lovely little pop of color in the white, black, & green scheme I've got going on. What a lovely little accident!

 Further down the left, we've got some gauzey stuff, skulls, spiders... oh my!

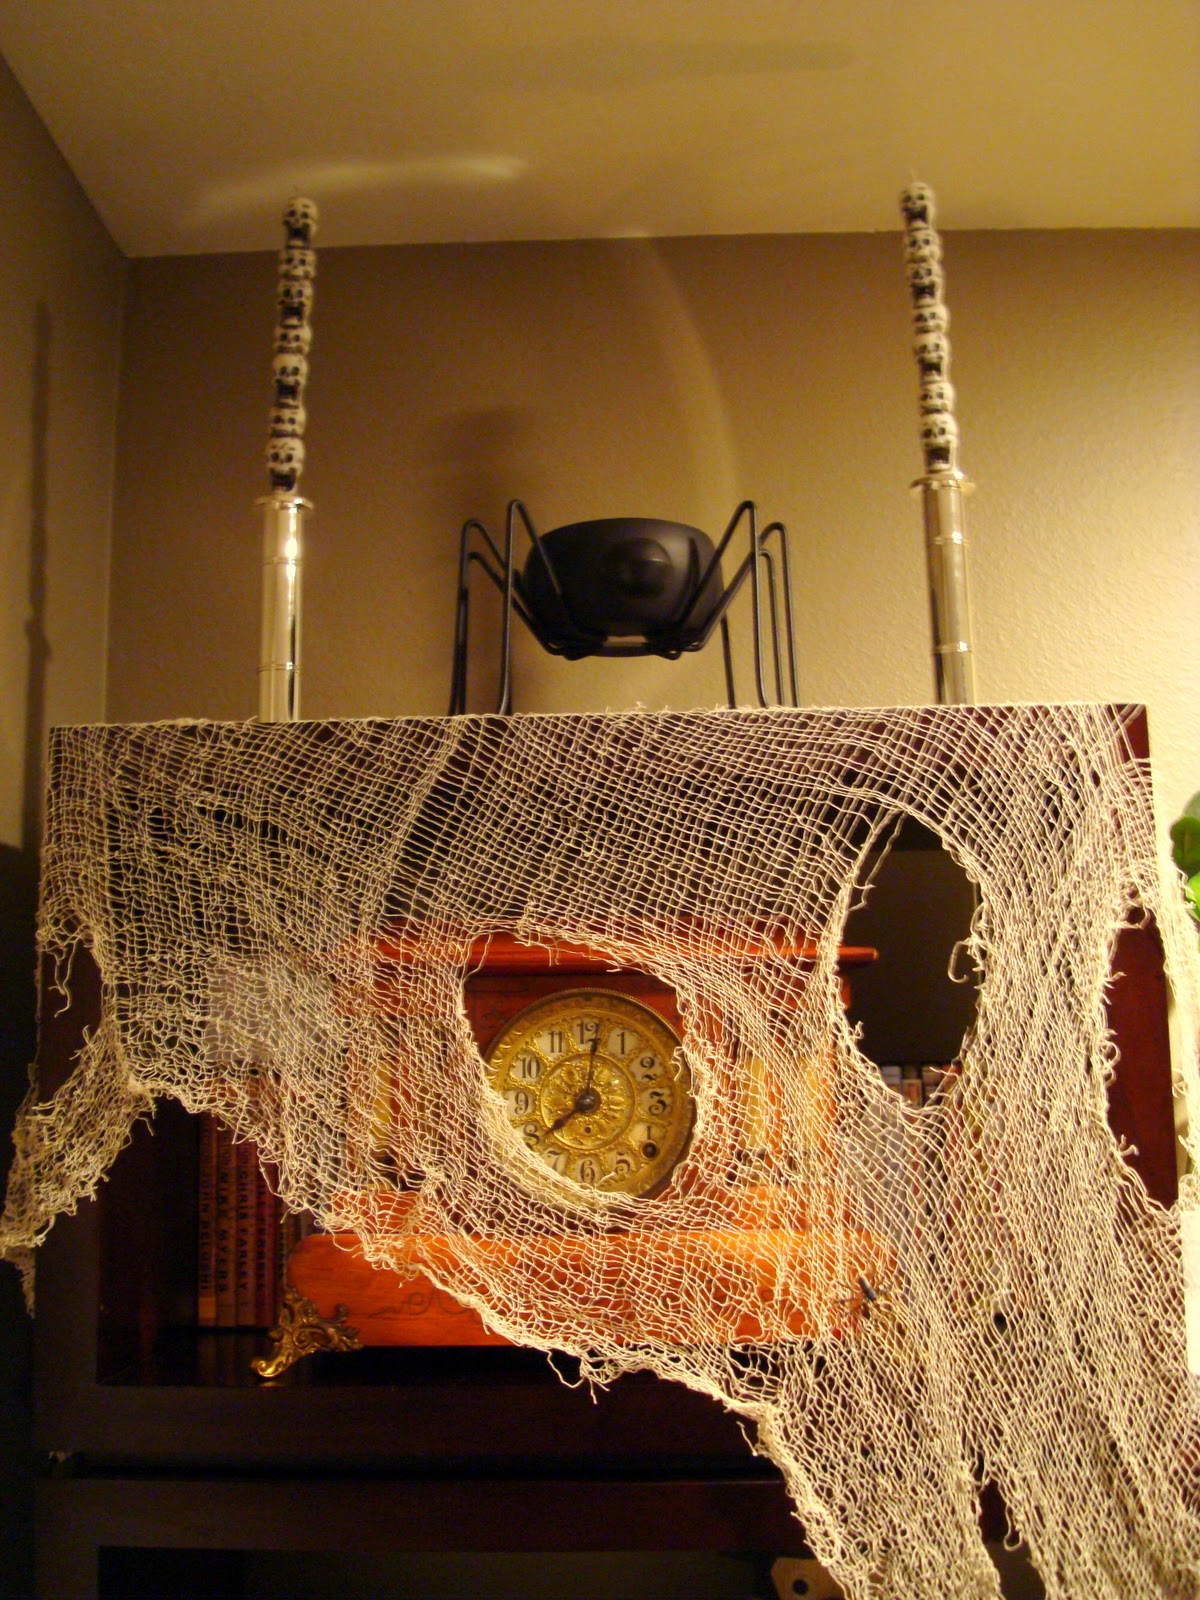
I love the contrast of my fancy Kate Spade candlestick holders (from Lani for Hubby & I's wedding. Woot!) and my skull candlesticks. Chic polished creepiness. That should be a new style. Having our fancy mantle clock peeking through the hole of the gauzey fabric is also chic polished creepiness. See? I think it's catch on... your welcome.
 

This is my favorite skull. Is that a weird statement? It probably is weird to have a favorite skull... It's the perfect silvery/grey color. And I am pretending that my stacked West Elm vases are potion jars. Pretend with me.

 We put some more gauzey fun by the tv, along with a skull and some spiders. I'm pretty sure Will will scare me with one or all of those spiders in the coming weeks. I will scream. And he will laugh. And my life of being scared by both my son and Hubby will have begun... Lucky me...

 Scary bat hanging from the ceiling fan? Check. Pumpkin lights on drapery rod? Check. Spiderweb lights outside on the balcony? Checkity Check Check!


I love it when I forget about something I bought last season... like these pillows from Target! I totally forgot about them and am super happy they're back in my life! I am loving the balance of black and orange on both sides of the sofa. Ah... Fall... Welcome to my home!

 Halloween is Hubby's favorite time of year, so just like Christmas (my favorite time), every stinkin' room in the house gets some spook-factor. At least if you're in the bathroom, you're near the toilet.


Will was particularly excited about putting a strand of pumpkin lights in his room. He wanted them left on when he went to bed tonight. Aw... I'm kind of jealous. I might have to go pick up some for our bedroom window. Everyone looks good in a warm orange glow... right? Don't worry, Captain Overprotective will unplug the lights and put the plug way up high so certain crazy little 2.5 year old doesn't decide he wants to turn the lights on himself. Safety 1st!

After getting all of our Halloween decor up, I just got super excited for the months to come. A switch to some fall decor come November... and then a switch to Christmas just weeks after that! Heaven! I love this time of year! Now if only our weather would catch up and cool down... 
Related Posts Plugin for WordPress, Blogger...
 

Blog Design by Eedee Design Studios